Build an Anchor Model with Oracle SQL Developer Modeler 4.0 (SDDM)

In my last posts I’ve build a head version model starting from a SDDM relational model. In this post I’m going to create an Anchor model from a SDDM logical model. I think this is a better approach, it is a more domain driven approach.

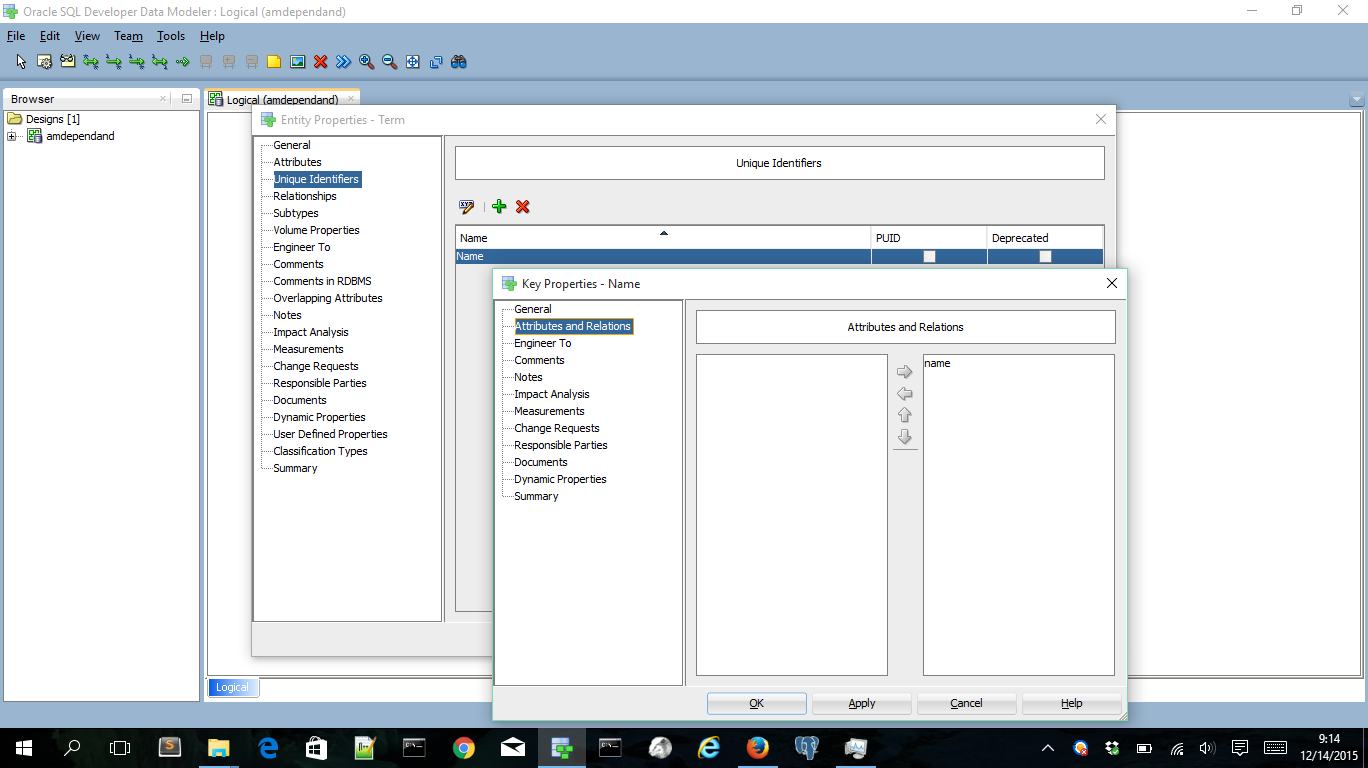
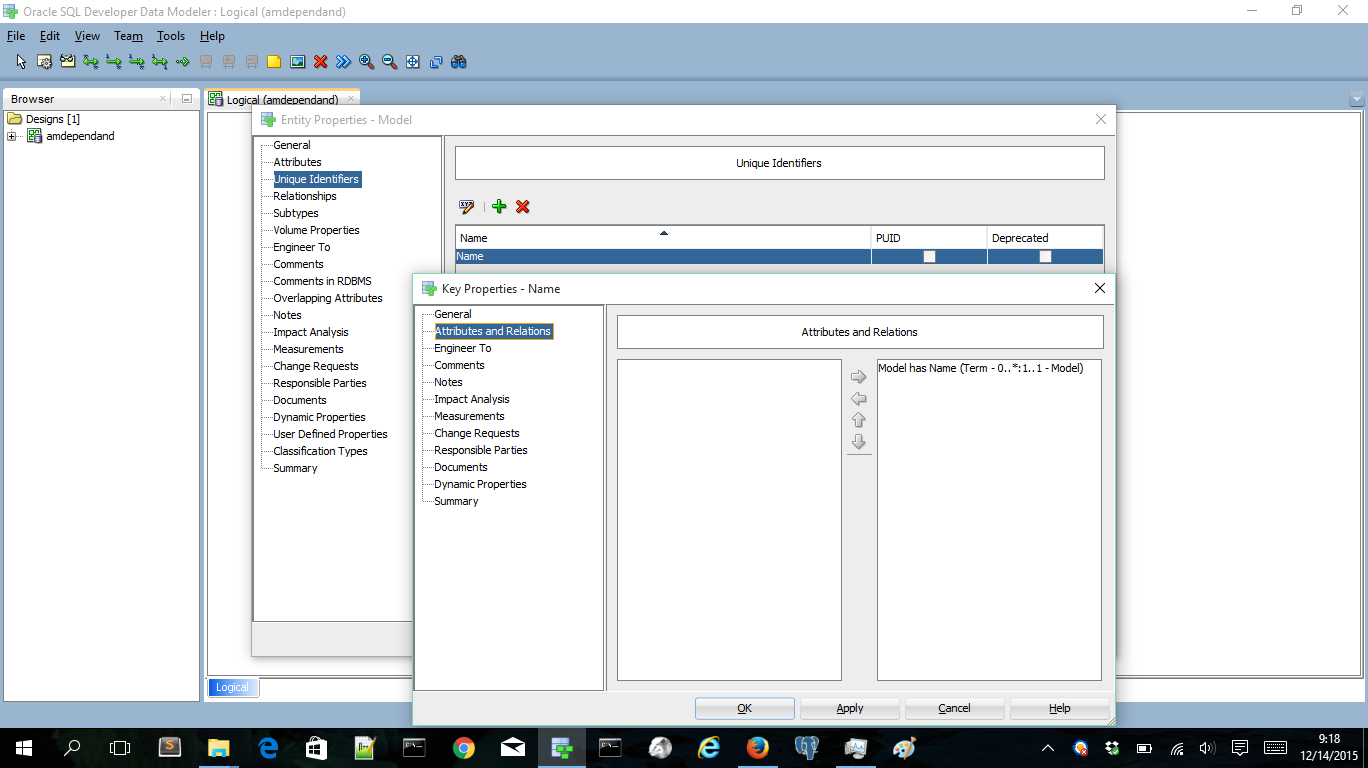
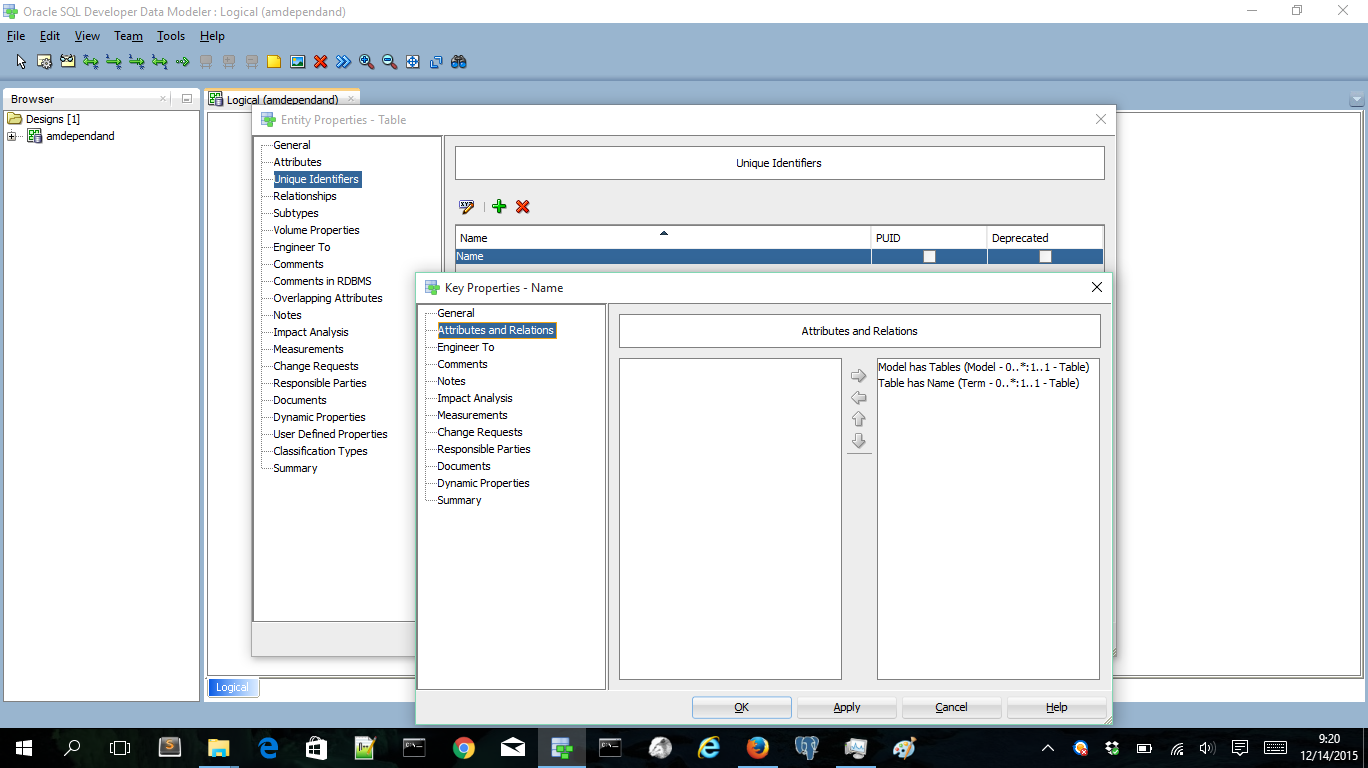
I’ve created a small (meta) data model to store table information in a model. The Model entity and the Table entity both store the name of a model/table. But instead of using a name attribute I made an extra entity Term. It stores all the ’terms’  we’re going to use. This Term entity has the attribute name. Later we can extend the Term entity with abbreviations or mnemonics of a name. Think of the 2 or 3 character mnemonics used in Anchor modeling or the abbreviations often used when deploying stuff to Oracle because of the 30 character limit. The name is an unique identifier of a Term

Term

Models have unique names;

Model

and a Table name is unique within the Model.

Table

This then results in the following logical model:

logicalmodel

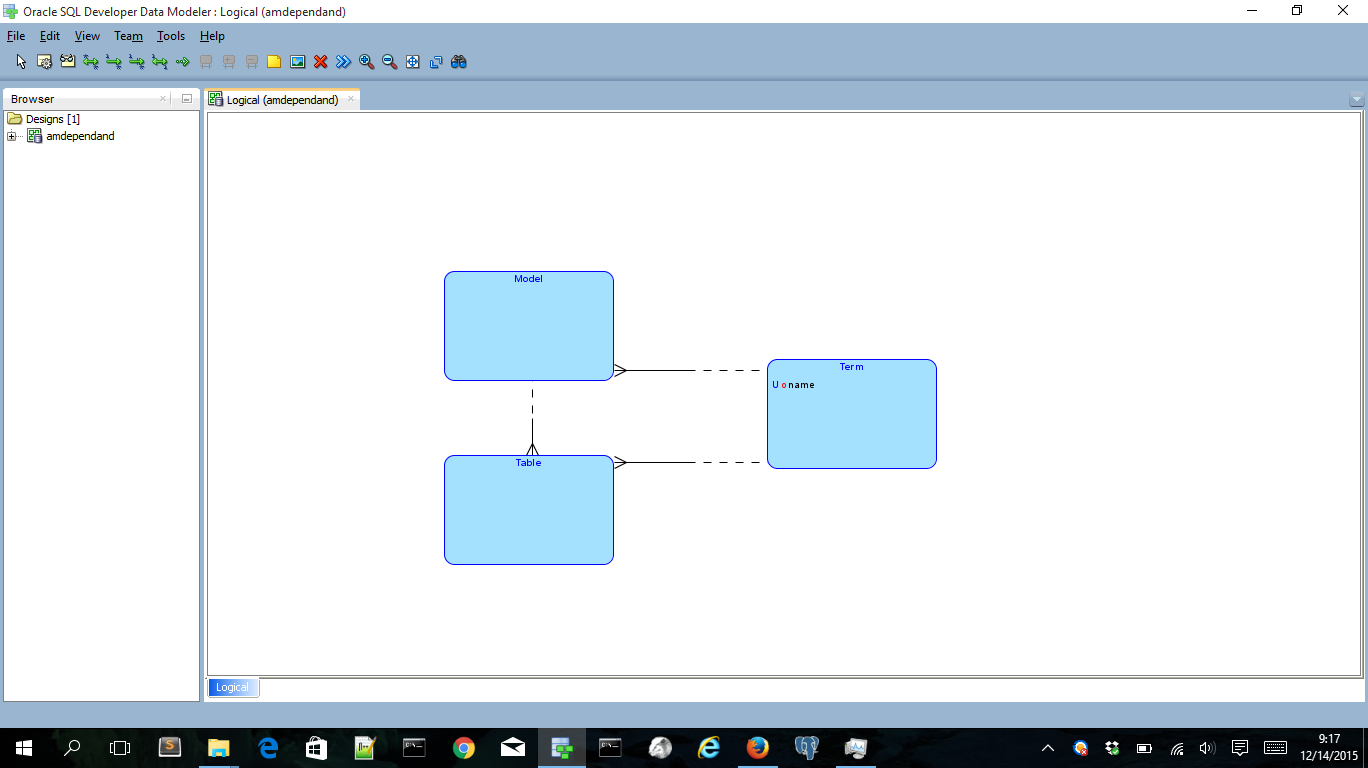
Now we have a small logical model to start with. The logical model I use, is a little UML style. The entities always generate a surrogate key as primary key and the relationships are always on the surrogate keys. First I’m going to generate an ERD relational model from the logical model. This is how we normally would generate a relational model. The next step is to generate an Anchor model by generating again the relational model and then split of tables like I did in previous posts. As a benefit we have mappings from the ERD model to the Anchor model via the logical model. Maybe we can use this in an other post to create the logic to load data in the Anchor model.

OK, let’s generate the ERD model and see how it looks.

ERD

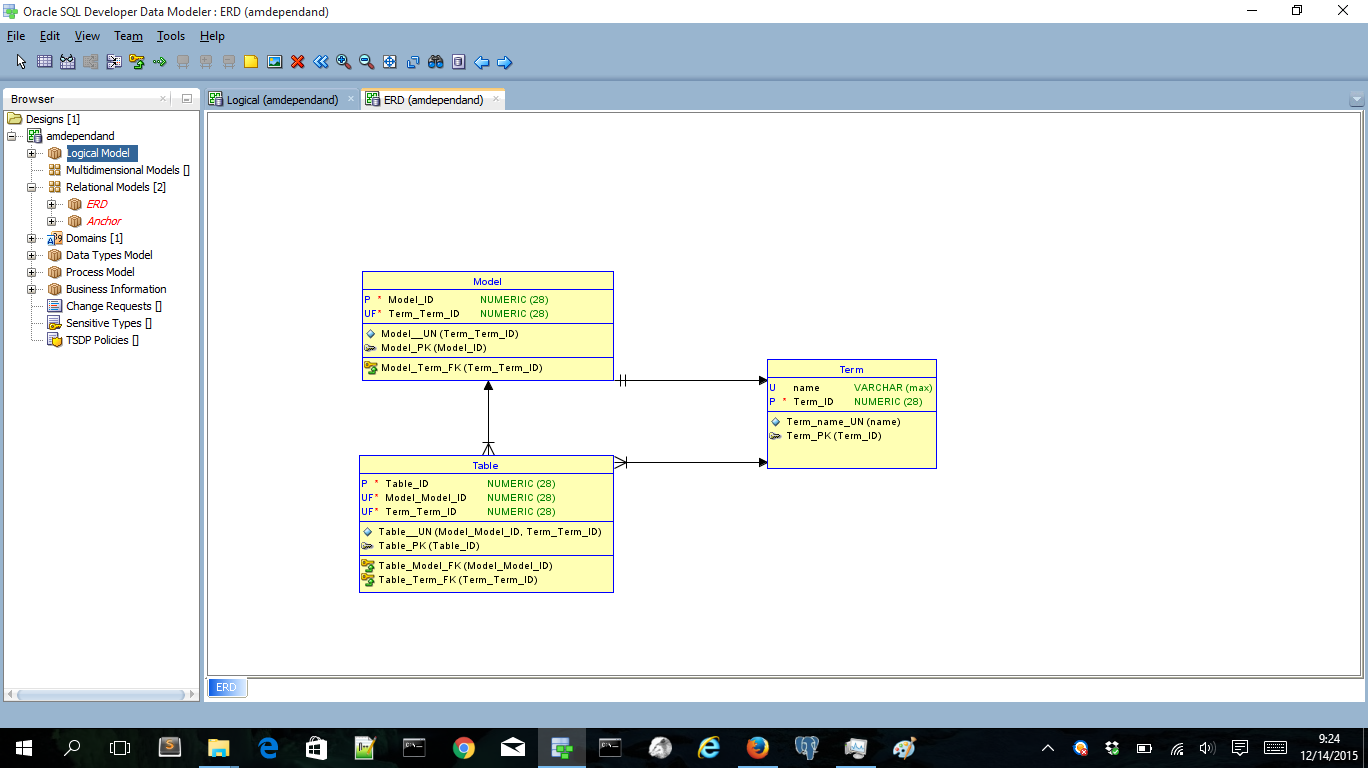
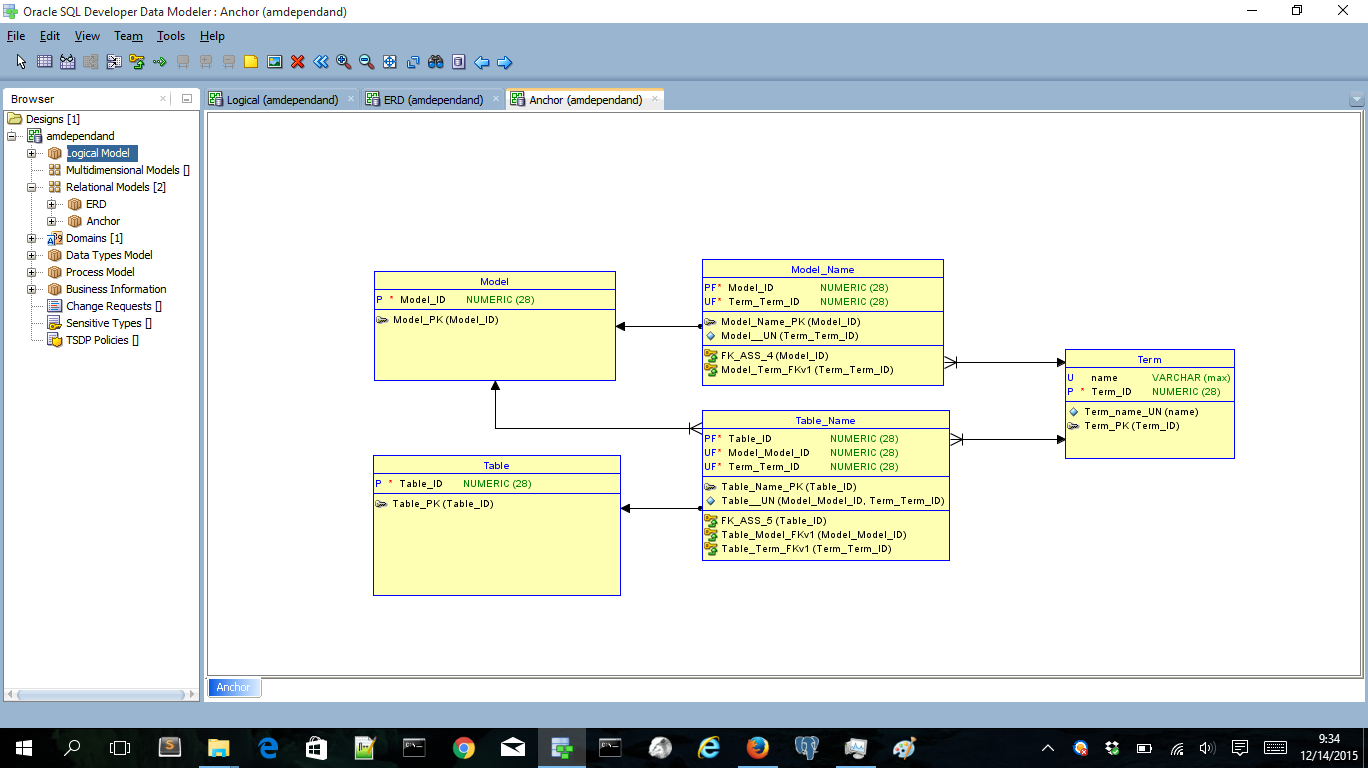
Looks fine to me. The three entities are converted to tables.  All surrogate and unique keys are correctly generated and all relationships are based on the surrogate keys. I’m doing the same trick again to create the second relational model that I’m going to use to create the Anchor model. Then I’m going to split the Model table. The only part we can split of is the FK of Term:

AM-split-model-name-FK-UN

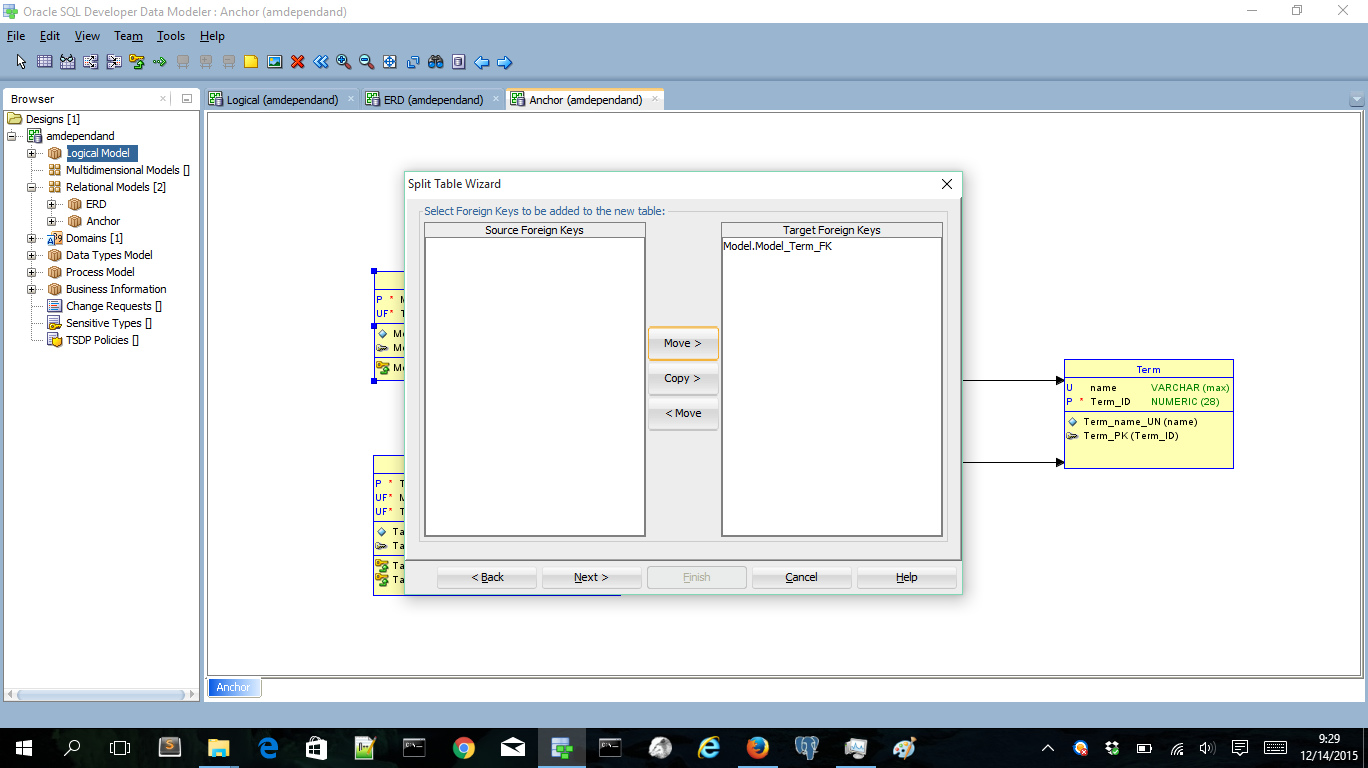
Now we’ve created a 1:1 Tie in Anchor modeling terms:

AM-split-model-name

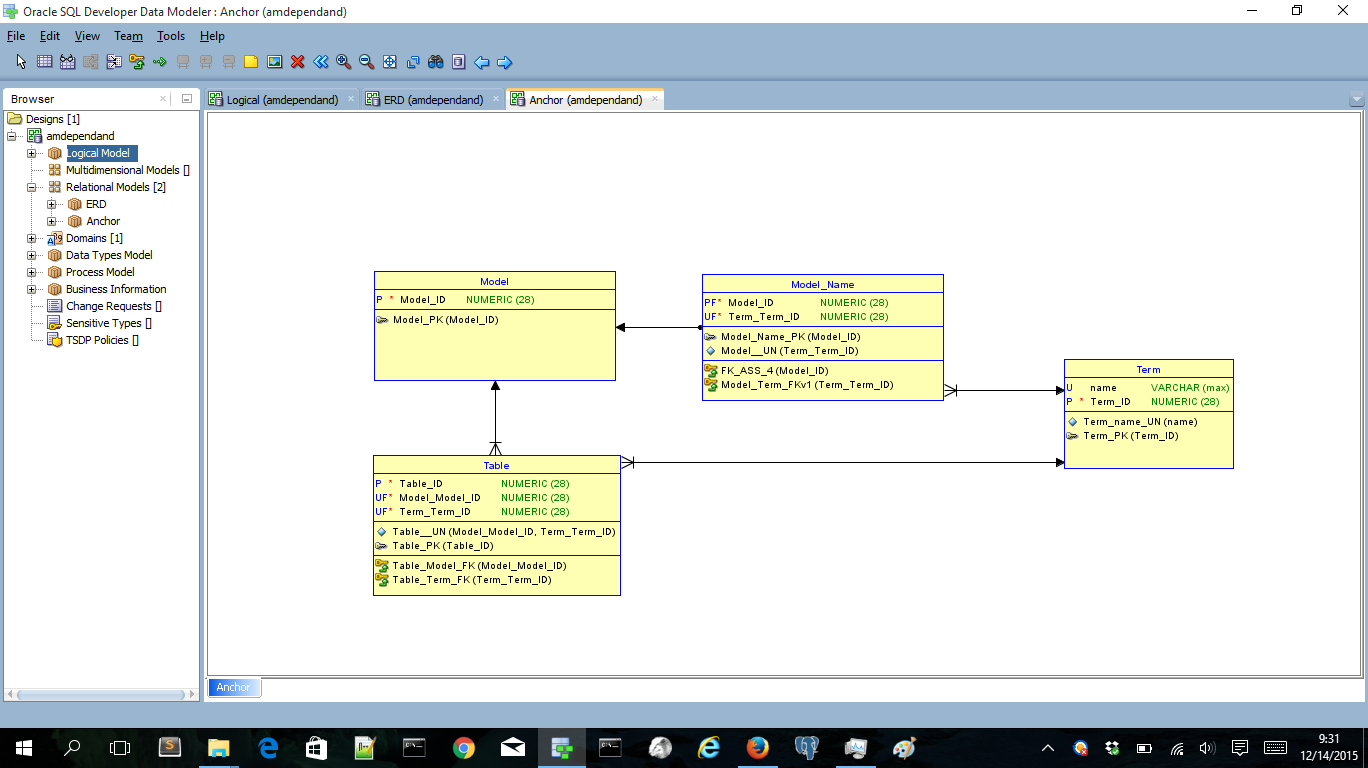
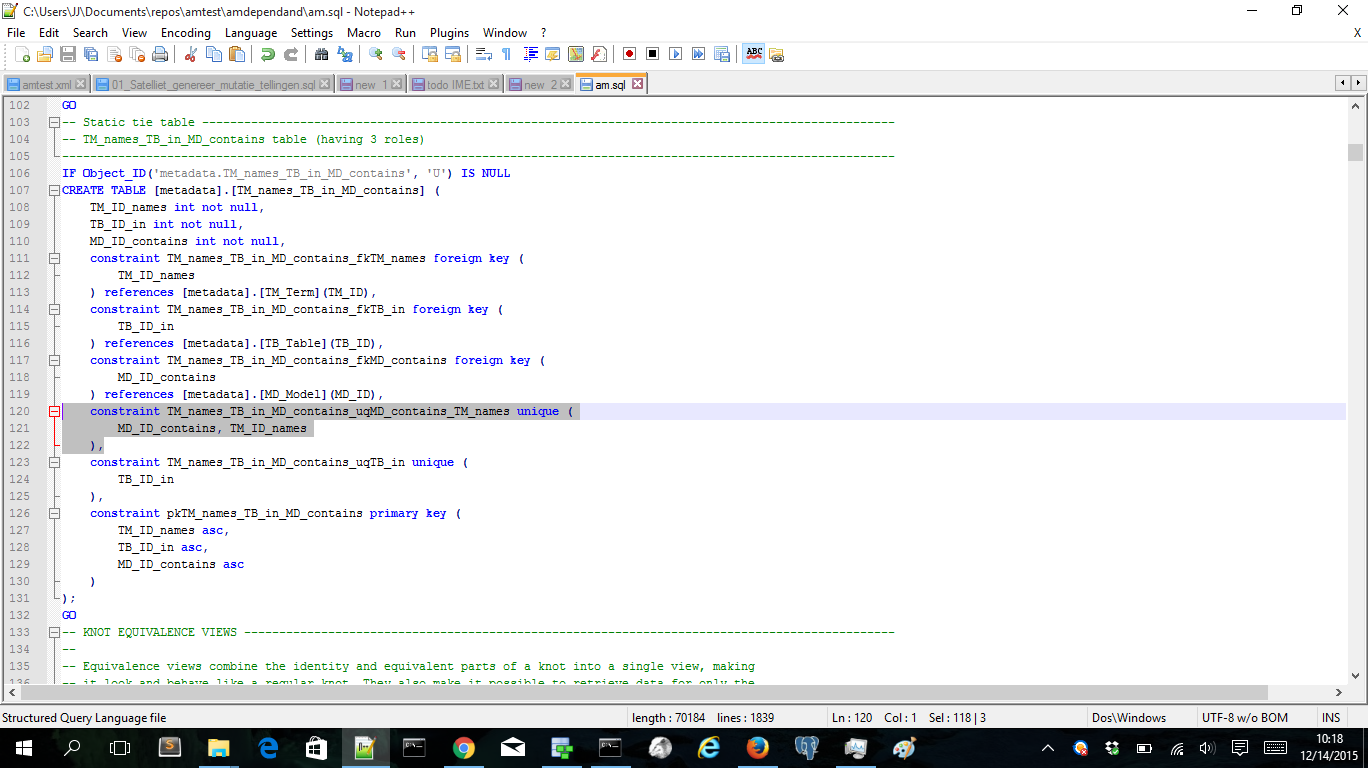
We can do the same with the Table entity. Now we’ll split of the unique identifier of a Table. The unique key is composed of both FK’s. So let’s split of the FK’s:

AM-split-table-name-FK-UN

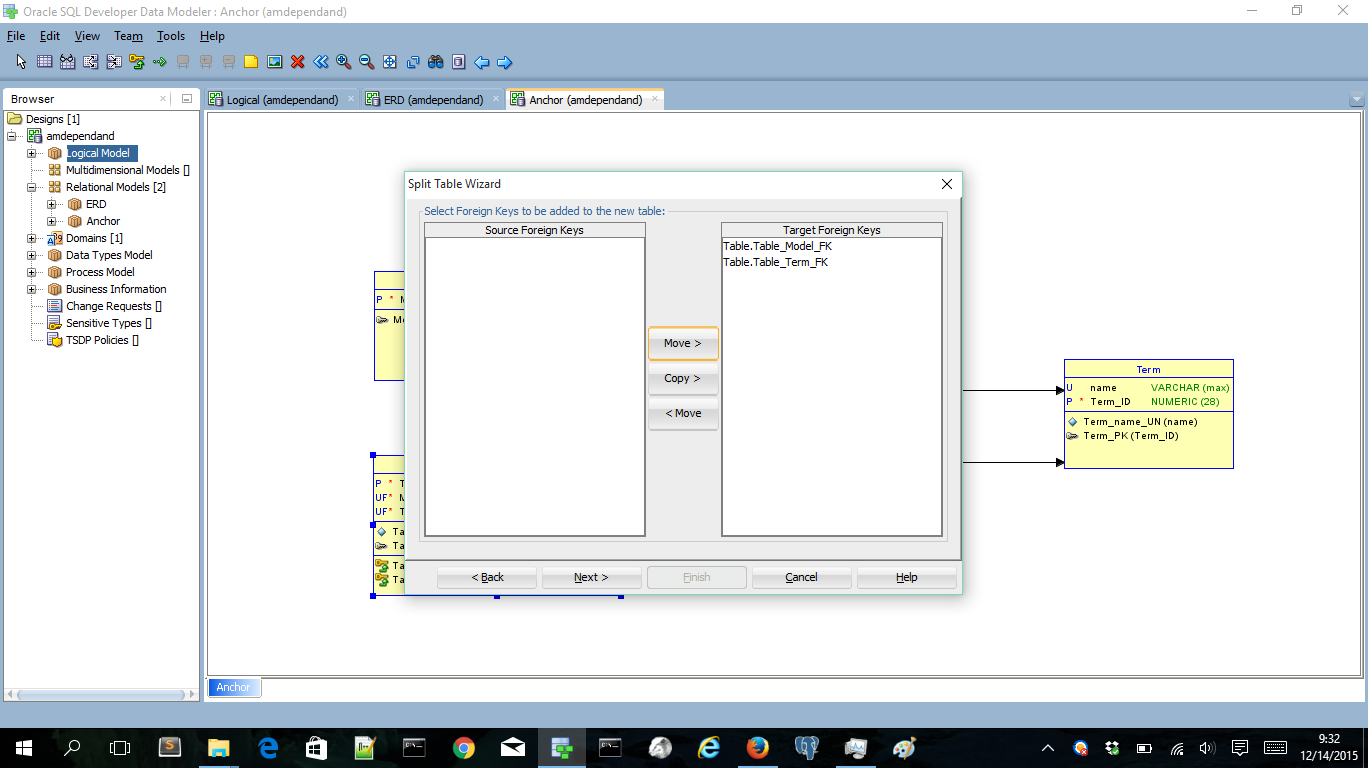
Now we’ve created a three way tie, but with 2 unique keys!

AM-split-table-name

The final step is to split the term table. We’ll split of the name attribute:

AM-split-term-name-columns

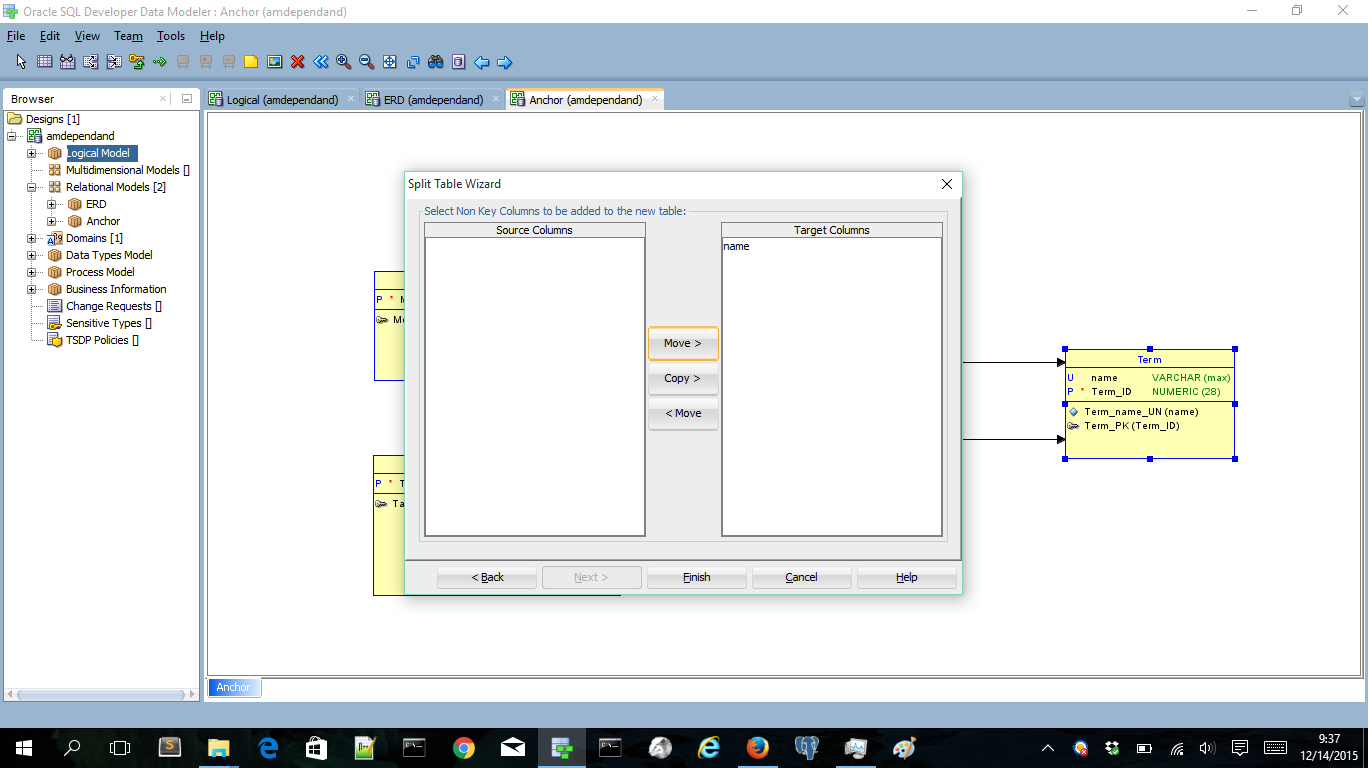
Now we have created an attribute table in Anchor modeling terms. I’m also adding some classifications to get the Anchor modeling coloring style 🙂

AM-classified

Nice we’ve created an Anchor model out of the original logical model. The (almost) equivalent model created in the very nice Anchor modeling tool (running locally on my PC):

AM-Anchor-tool

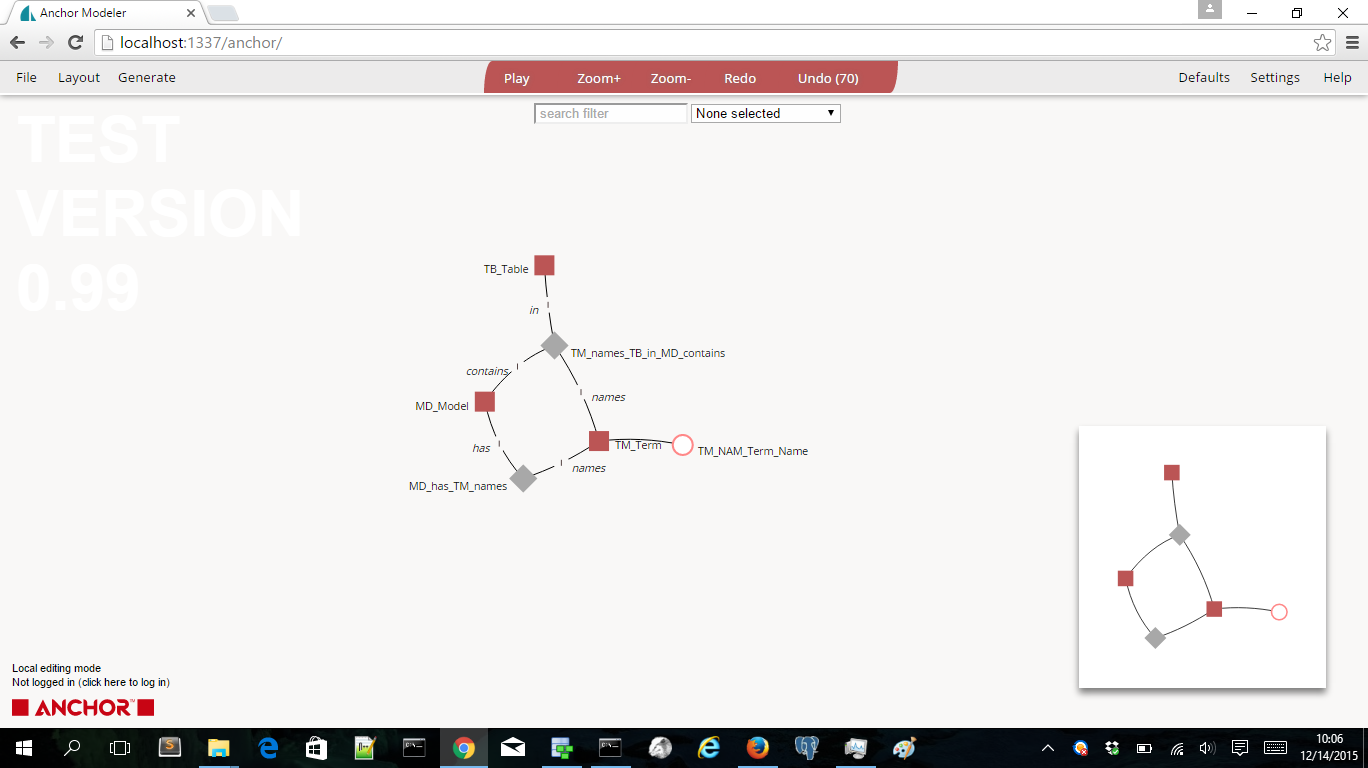
The only thing you have to do is to change is the unique keys of the three way tie. The above model generates three single unique keys in the tie. But we need only two unique keys:

AM-tie-3-sql-changed

Now we have somehow combined the TM_names and the MD_contains roles. The Anchor modeling tool does a lot more. It also generates views and several table value functions that are acting as parametric views. These let you query easily on the Anchor model 🙂

That’s all for now. I’ve made a GitHub repository with models. Happy Anchor modeling 🙂

Build a Head Version model with Oracle SQL Developer Modeler 4.0

In the previous post we started with the generic steps in OSDM to create a historic version of your relational model. This post will explain the next four steps we need to create a Head Version Model.

  1. then create a new relational model with one table that contains the ‘default columns’
  2. then forward engineer the surrogated logical model to the new relational model and use the table with the ‘default columns’ as template
  3. split the tables using the split table wizard to get the correct tables
  4. extend the primary key of the ‘version/history’ tables

The new relational model will be named ‘example_head_version’. I will add a ‘defaultcolumns’ template table with the columns:

  • dwh_valid_from, the start date of the version validity
  • dwh_valid_to, the end date of the validity
  • dwh_status, the status of the record. I think it is a kind of a ‘valid’ or ‘deleted’ / ‘voided’ indicator to get a continuous time line
  • dwh_source, the original source of the record

The first three columns should land in the ‘Version’ tables and the last one lands in the ‘Head’ tables.
1. Create a new relational model with one table that contains the ‘default columns’

Now that we have a new relational model with the ‘defaultcolumns’ template table we can forward engineer the logical model.
2. then forward engineer the surrogated logical model to the new relational model and use the table with the ‘default columns’ as template

The forward generated relational model now looks like this:

Now we can start with splitting the tables via the spit table wizard. We split of the ‘Version’ tables and the remaining part is then the ‘Head’ table. The ‘Head’ tables contain the business key and the attributes that are not going to change over time. The ‘Version’ table contains the dynamic or changing attributes over time.
3. split the tables using the split table wizard to get the correct tables

Split of the product version table.

The product table has no foreign keys so we go on to the next step in the wizard to move the ‘dynamic’ Price attribute and the ‘defaultcolumns’ needed for the ‘Version’ table.

Split the Interest version table.

The Interest table’s foreign keys are part of the business keys and have to stay in the ‘Head’ table. They are not dynamic and do not change over time! Let’s go on with the attributes.


Now the Interest version table is created we go on with the Employee table.
Split the Employee version table.

In the Employee table the foreign keys are not part of the business key and are qualified as dynamic. We have to add them to the ‘Version’ table to track the changes. Let’s go on and add the dynamic attributes.

As you can see I left the Gender attribute in the ‘Head’ table, because I assume it does not change. The table split of the Department table is similar to the split of the Product table.
Finally we are at the last step.
4. extend the primary key of the ‘version/history’ tables
I’ve also added some classifications with some coloring. Then the resulting model is:

Looks OK to me 🙂 The only thing left is to show the mappings from the ‘source’ model to the ‘history’ model.

The mappings on table level for Employee:

The mappings on attribute level for the business key of Employee:

And finally the mappings for a dynamic attribute of Employee:

The resulting model is stored in the branch head_version in this Github repo.
Nice, we have now mappings from source to target relational model via the logical model. Just some steps away of generating ETL based on these mappings. Next post the ‘regular’ Anchor Vault. Even more splitting of tables 😉

Build history models with Oracle SQL Developer Modeler 4.0, intro

Oracle SQL Developer Modeler (OSDM) is a nice free data modeling tool with a lot of nice features. I’m going to use a set of these features to create historic versions of a sample model. Hans Hultgren and Martijn Evers have made a classification of Ensemble Modeling Forms or Styles of Data Vault modeling historical data warehouse modeling styles. The classifications I will use:

  • – Classical (a.k.a. Dimensional) Data Vault of Dan Linstedt
  • – Anchored Data Vault (a.k.a.) Anchor Vault
    • – the strong version , with no end dated links
      • used in the open source dwh automation tool Quipu and explained by my college Lulzim
    • – the weak version, with end dated links
    • elementary Anchor Vault, all attributes are split in separate tables except the business key
  • Anchor Modeling, all attributes are split in separate tables including the business key
    • Focal point modeling, externalizes the business key but groups attributes

I’m going to build two versions of a weak Anchor Vault version:

  • a Head Version model, this is the maximum grouped version of an Anchor Vault
  • a ‘regular’ Anchor Vault, this is a less grouped version where we split the foreign keys and the attributes

The last one will be an Anchor Model, the most split version of them all.

The general approach used for all the three models in OSDM is:

  1. reverse engineer a (source) model in OSDM into a Relational model
  2. then forward engineer the relational model a to logical model
  3. then in the logical model ‘surrogate’ the model

This is the starting point for all of the models and is equal for all of the models. The next steps are used for all of the three variants, but are slightly different for each model type:

  1. then create a new relational model with one table that contains the ‘default columns’
  2. then forward engineer the surrogated logical model to the new relational model and use the table with the ‘default columns’ as template
  3. split the tables using the split table wizard to get the correct tables
  4. extend the primary key of the ‘version/history’ tables

The nice thing of this approach in OSDM is that at the end we have a mapping between the ‘source model’ and the ‘historical model’ via the logical model.
Let’s get started with the first three generic steps. First we have a DDL of the source model:

CREATE TABLE Department
( DepName VARCHAR (255) NOT NULL
, Budget  DECIMAL (12,2)
)
;

ALTER TABLE Department ADD CONSTRAINT Department_PK PRIMARY KEY ( DepName )
;

CREATE TABLE Employee
( EmpName      VARCHAR (255) NOT NULL
, Gender       CHAR (1)
, DepName      VARCHAR (255) NOT NULL
, Job          VARCHAR (255)
, HoursPerWeek SMALLINT
, Manager      VARCHAR (255)
)
;

ALTER TABLE Employee
ADD CONSTRAINT Employee_PK
PRIMARY KEY ( EmpName )
;

CREATE TABLE Interest
( EmpName  VARCHAR (255) NOT NULL
, ProdName VARCHAR (255) NOT NULL
, Degree   SMALLINT
)
;

ALTER TABLE Interest
ADD CONSTRAINT Interests_PK
PRIMARY KEY ( EmpName, ProdName )
;

CREATE TABLE Product
( ProdName VARCHAR (255) NOT NULL
, Price    DECIMAL (12,2)
)
;

ALTER TABLE Product
ADD CONSTRAINT Product_PK
PRIMARY KEY ( ProdName )
;

ALTER TABLE Employee
ADD CONSTRAINT Employee_Department_FK
FOREIGN KEY (DepName ) REFERENCES Department ( DepName ) ;

ALTER TABLE Interest
ADD CONSTRAINT Interest_Employee_FK FOREIGN KEY ( EmpName
) REFERENCES Employee ( EmpName )
;

ALTER TABLE Interest
ADD CONSTRAINT Interest_Product_FK
FOREIGN KEY ( ProdName ) REFERENCES Product ( ProdName )
;

ALTER TABLE Employee
ADD CONSTRAINT Manager_FK
FOREIGN KEY ( Manager ) REFERENCES Employee ( EmpName )
;

1. Import the DDL file into a Relational model. I used the DB2/UDB 7.1 setting to import this DDL correctly. The result is a nice model:

Ok, now we have the model in OSDM.
2. We can forward engineer it to a logical model.

3. The last generic step is to surrogate the model. I made a nice JavaScript you can use to automate this part. You can add this as a custom transformation script:

In the screenshot above the ‘Mozilla Rhino’ engine is not there but the ‘Rhino’ engine is there on my Ubuntu machine. Somehow the same javascript engine it is reported different. The logical model know looks like this:

The model in this state is preserved in this GitHub repository as master.
All the next versions will be saved as a branch of the master model. That’s it for now. The next posts will be: